The Ultimate Guide: How to Make Satin Ribbon Not Fray
As a satin ribbon enthusiast or crafter, few things are more frustrating than watching the delicate edges of your beautiful ribbon unravel. Whether you’re working on a gift wrap project, creating hair accessories, or designing wedding decor, frayed ribbon can ruin the appearance of your work. At RibbonBuy, we understand this common pain point from years of experience supplying quality ribbons to crafters worldwide. In this comprehensive guide, we’ll share proven, practical methods to keep your satin ribbon edges perfectly intact.
Why Does Satin Ribbon Fray?
Before we dive into solutions, let’s briefly understand why fraying occurs. Satin ribbon is typically woven from synthetic fibers like polyester or nylon. Unlike natural fibers, these synthetics are smooth and slippery, which means the threads can easily separate when cut. The bias-cut edges (cut at an angle to the weave) are particularly vulnerable. Knowing this helps us choose the most effective prevention methods.
7 Effective Methods to Stop Satin Ribbon from Fraying
1. The Heat Seal Method (Most Professional)
This is our top recommendation for synthetic satin ribbons, and the method we most frequently demonstrate to our customers.
What you’ll need: A lighter, candle, or specialized ribbon heat-sealing tool.
Steps:
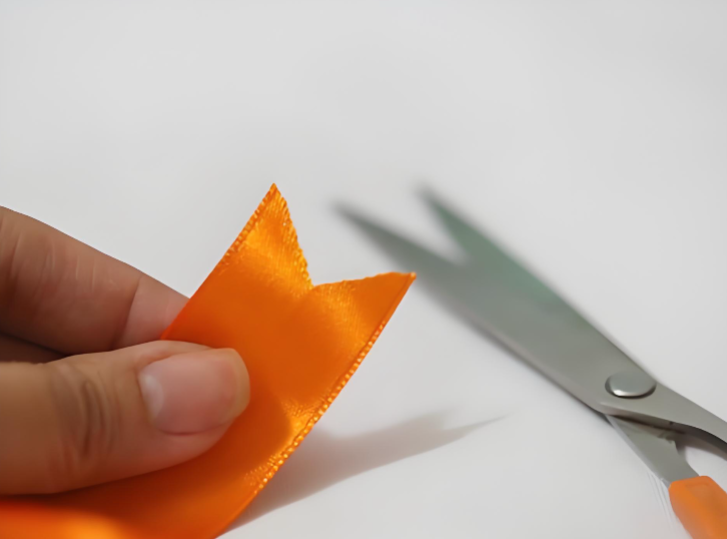
- Cut your ribbon to the desired length using sharp scissors.
- Hold the cut edge close to (but not directly in) the flame.
- Slowly rotate the edge until you see the fibers slightly melt and fuse together.
- Allow 2-3 seconds for cooling before handling.
Pro Tip from Our Workshop: Practice on scrap ribbon first. The goal is to melt just enough to seal—overheating will cause discoloration or hard edges. For consistent results, consider investing in a heat-sealing tool which provides controlled temperature.
2. Clear Nail Polish or Fabric Glue (Easiest for Beginners)
Perfect for those who prefer non-heat methods, especially with delicate projects.
Steps:
- Apply a thin layer of clear nail polish, fabric glue, or specialized fray check solution along the cut edge.
- Allow it to dry completely on a non-stick surface (wax paper works well).
- For best results, apply to both sides of the ribbon.
Our Experience: While effective, this method can sometimes leave visible residue or stiffen the ribbon. Test on a small area first, especially with light-colored ribbons.
3. The Scorch-Guard Method for Cotton Satin Blends
If your satin ribbon contains natural fibers, heat might not work effectively. Instead:
Steps:
- Use pinking shears (scissors with zigzag teeth) to cut your ribbon.
- The zigzag pattern disrupts the straight grain, making it harder for fraying to travel.
- Combine with a tiny dot of fabric glue at each „peak“ of the zigzag for extra security.
4. The Fold-and-Stitch Technique (For Sewn Projects)
If you’re incorporating ribbon into sewing projects, this traditional method adds durability.
Steps:
- Fold the raw edge under by approximately ¼ inch.
- Use a matching thread and small, neat stitches to secure.
- For invisible results, try a slip stitch or blind hem stitch.
5. Fusible Interfacing Tape (Invisible and Flexible)
Our customers often overlook this excellent solution.
Steps:
- Cut a small piece of lightweight fusible interfacing tape.
- Sandwich the ribbon edge between the tape and a pressing cloth.
- Iron briefly with medium heat according to the tape instructions.
6. The Clean-Cut Foundation
Prevention starts with proper cutting:
- Always use sharp, fabric-only scissors—dull blades crush fibers, encouraging fraying.
- For perfectly straight cuts, use a rotary cutter and quilting ruler.
- Some crafters swear by quickly passing the cut edge through a flame before any handling occurs.
7. Specialized Anti-Fray Products
Consider these RibbonBuy customer favorites:
- Fray Check liquid: Specifically formulated for synthetic fabrics
- Craft sealants: Water-based options that dry clear and flexible
- Decoupage medium: Thin layers can effectively seal edges
Bonus Expert Tips from Our RibbonBuy Team
How to Cut Satin Ribbon Perfectly Straight:
Mark your cutting line with a fabric pencil or use a rotary cutter with a straight edge. For wide ribbons, make a small snip then tear gently—this follows the natural grain, though it only works with certain weaves.
Is There Ribbon That Doesn’t Fray?
Yes! Consider these options available in our store:
- Polyester grosgrain ribbon: Has a textured surface that resists fraying
- Wired-edge satin ribbon: Contains fine wires that stabilize edges
- Laminated or coated ribbons: Feature protective surface layers
- Pre-cut ribbon lengths with sealed edges: Our factory-sealed options save time
How to Adhere Satin Ribbon Without Visible Residue:
For temporary placement, use double-sided tape specifically for fabrics. For permanent bonding, we recommend fabri-tac glue applied in thin lines rather than thick dots.
Safety First: Important Precautions
- Always work in a well-ventilated area when using sealants or adhesives
- Keep flames away from flammable materials
- Test any method on a scrap piece first, especially with expensive or specialty ribbons
- Store treated ribbons flat until completely dry to prevent accidental bonding
Troubleshooting Common Issues
Problem: Heat method discolored my ribbon.
Solution: You held it too close to the flame. For dark ribbons, try a hotter but quicker pass. For light ribbons, use lower heat with slightly longer exposure.
Problem: Glue method made my ribbon stiff.
Solution: Next time, dilute white glue with a few drops of water, or use specialized fabric glue designed to remain flexible.
Problem: The edges still frayed after treatment.
Solution: You might have a natural fiber blend. Try combining methods—heat seal lightly, then apply a thin layer of fray check for reinforcement.
Conclusion: Choosing Your Best Method
Through years of testing and customer feedback at RibbonBuy, we’ve found that the heat method works best for most synthetic satin ribbons, while fabric glue or specialized fray preventatives work better for blends or delicate projects.
Remember that different ribbon widths and qualities may respond differently. The 3/8 inch polyester satin ribbon might seal perfectly with heat, while the 2 inch double faced satin ribbon might require a different approach. When in doubt, purchase a little extra ribbon for testing—it’s worth the investment for perfect results.
At RibbonBuy, we stand behind our products and want your crafting experience to be successful. We offer a range of pre-treated anti-fray ribbons and quality sealing tools that we’ve tested extensively. Whichever method you choose, taking those extra moments to properly seal your ribbon edges will elevate your projects from homemade to professionally crafted.
Have questions about a specific ribbon type or project? Share your concerns in the comments below—our team of ribbon specialists monitors this space regularly and would be happy to offer personalized advice based on our extensive experience in the field.